Software Prototyping (Ⅵ) - Continuous integration with Github Actions
Software Prototyping (Ⅵ) - Continuous integration with Github Actions
Continuous integration (CI) servers are a great way to make sure that all changes to master are tested before deploying. CI servers are also great for automating the deployment part. CI servers used to be a real pain to configure. Cloud-based CI servers have simplified things so that now there’s no reason not to set one up for any project that needs public deployment.
Quickstart for Github Actions
Follow this link : CI with Github Actions to Enable your Github Actions and run your Github Actions workflow.
Github looks for workflow files. These are YAML files in the subdirectory .github/workflows at the root of the repository.
YAML for ReactJS web apps
First, here is a basic workflow file for ReactJS.
Read through the text that follows to understand how the script works. A similar script appears in the next subsection for testing and deploying the web version of an Expo React Native app. That section assumes you’ve read and understood this section.
Then create a main.yml file under .github/workflows/ folder :
name: React CI

on: [push]

jobs:
  build:
    name: Build and unit test
    runs-on: ubuntu-latest
    steps:
      - uses: actions/checkout@v2
      - uses: actions/setup-node@v2
        with:
          node-version: '14'
      - run: npm install
      - run: npm run build --if-present
      - run: npm test

  cypress:
    name: Cypress test
    runs-on: ubuntu-latest
    steps:
      - uses: actions/checkout@v2
      # https://www.cypress.io/blog/2019/11/20/drastically-simplify-your-testing-with-cypress-github-action/
      - uses: cypress-io/github-action@v2
        with:
          build: npm run build
          start: npm start
          wait-on: http://localhost:3000

  deploy:
    name: Firebase deploy
    needs: [build, cypress]
    runs-on: ubuntu-latest
    steps:
      - uses: actions/checkout@v2
      - uses: actions/setup-node@v2
        with:
          node-version: '14'
      - run: npm install
      - run: npm run build
      - run: npm install -g firebase-tools
      - run: firebase deploy --token "${{ secrets.FIREBASE_DEPLOY_TOKEN }}" --non-interactive
This defines three jobs:
- build: this builds the app and runs any unit tests
npm install
npm run build --if-present
npm test- cypress: this builds the app and runs any Cypress end-to-end tests
npm run build
npm start- deploy: this builds and deploys the app to a Firebase host site if the first two succeed.
npm install
npm run build
npm install -g firebase-tools
firebase deploy --token "${{ secrets.FIREBASE_DEPLOY_TOKEN }}" --non-interactive
Deployment tokens for firebase
To deploy to Firebase, you have to have selected that option when you run firebase init. The initialization will ask what Firebase project you want to associate your app with. This could be a new project or an existing one. If you are already using the Firebase Realtime Database, use that project.
When Firebase asks what directory to use, enter build for React.
Test that deployment works locally first, do this for ReactJS:
npm run build
firebase deploy
The token is a secret encrypted key that Firebase will give you, that you need to store on Github. It should never be shared or put in any public location.
To get the key, use this command:
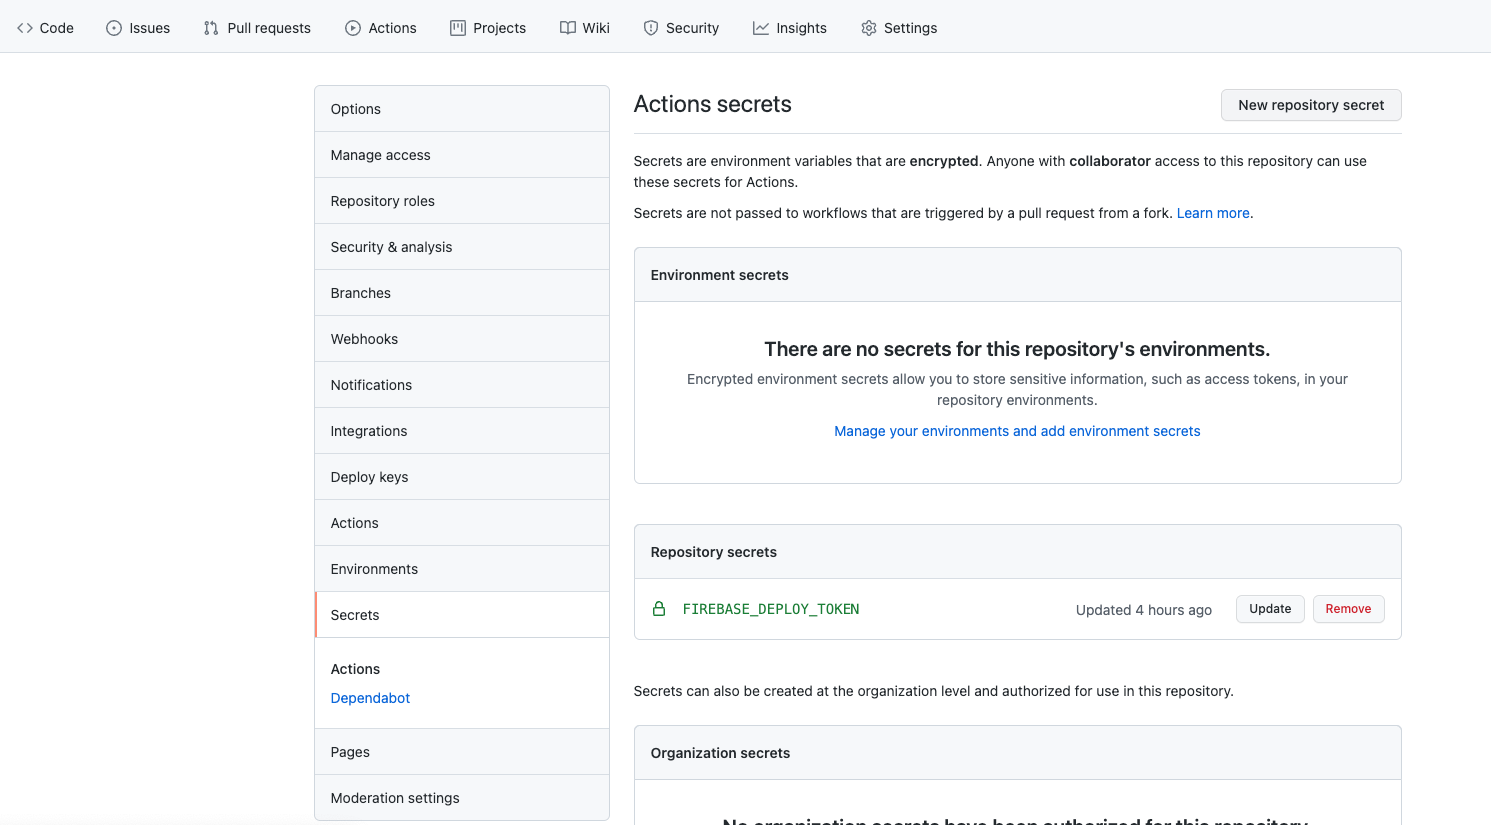
firebase login:ciDon’t put secret keys into the YAML file or any other code file that is checked in! Instead, store the key on Github in a secret environment variable. Go to the Github repository for your app. Go to the Settings page. Click on Secrets. Create a new repository key. Call it FIREBASE_DEPLOY_TOKEN. Copy and paste the encrypted key returned by firebase login:ci.
Test your CI set up
To test your CI set up, just using git push for your project, then check the Actions button on your repo like:
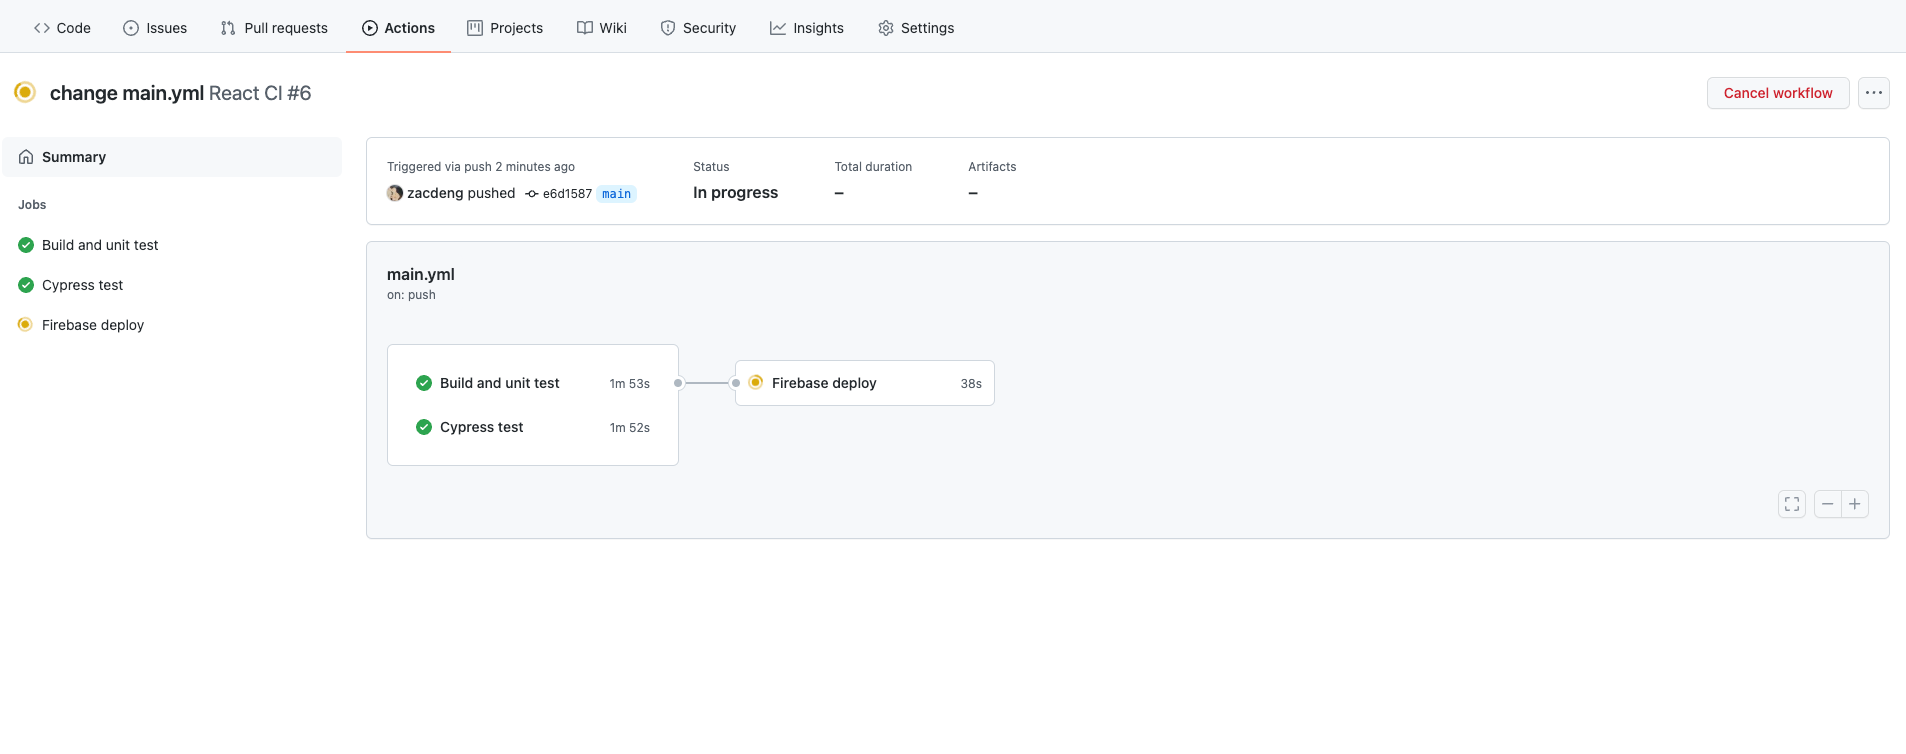
Running a ReactJS or React Native job may take several minutes or more. That’s fine. Except when first testing your CI configuration, you do not wait to see if your build and tests succeed on the CI server. Just build and test locally, commit and push, and go on to your next task. Github will email you the results.
To see if the status of an action, click on Actions at the top of your repo’s main page. There you will see a list of jobs that have been run or are in process. From there, you can view the terminal output of the job. This is where you can see if a build and test passed or failed.